Hardware Setup
Unboxing
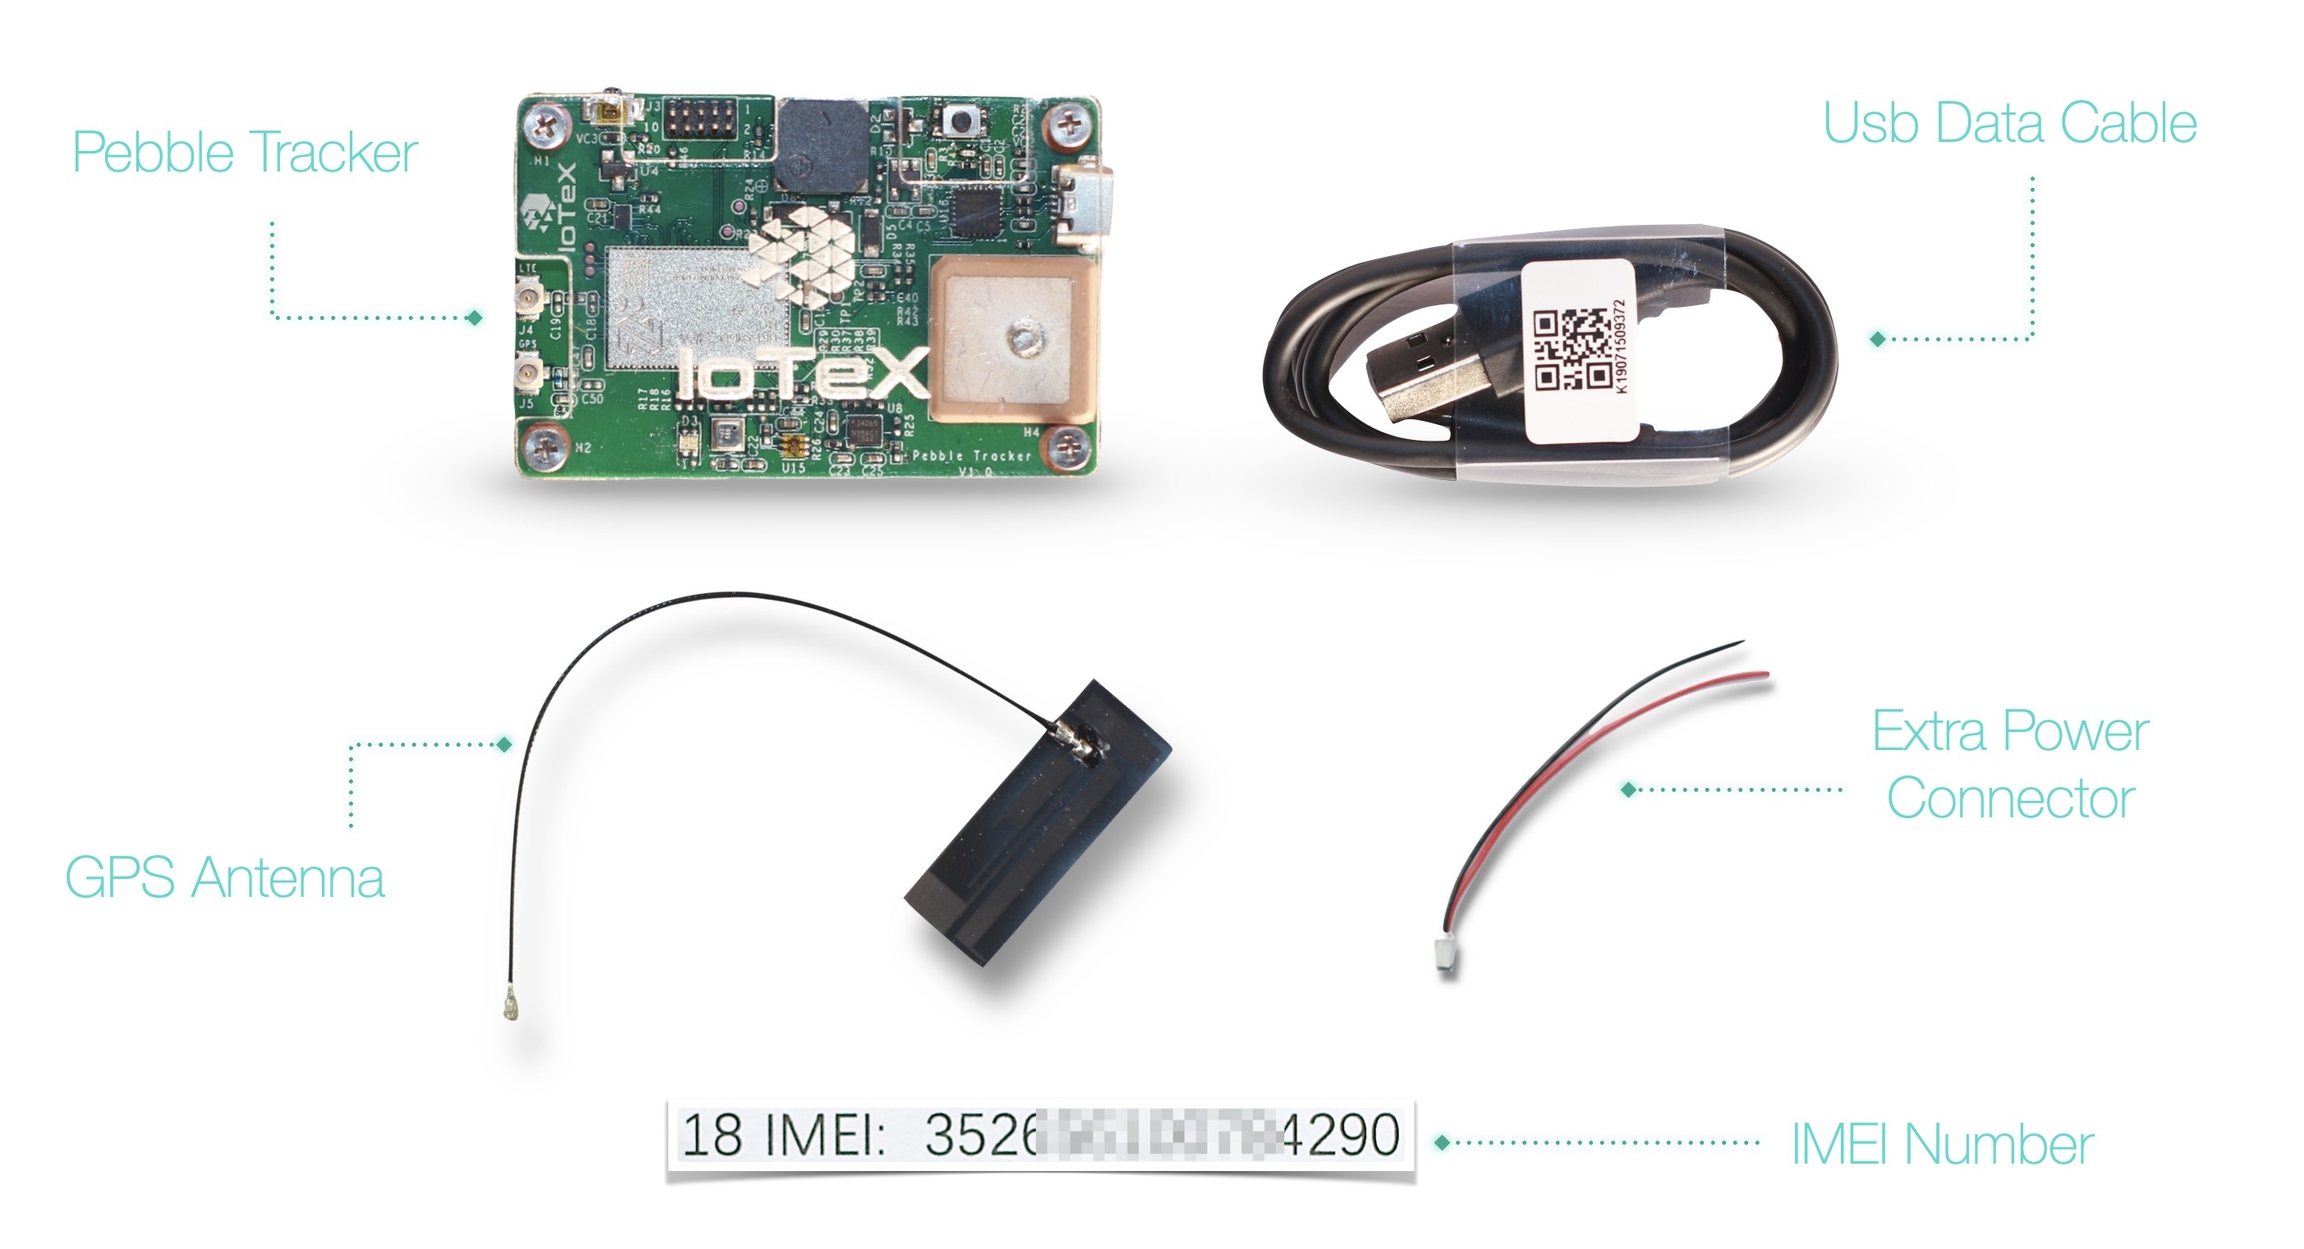
You Pebble box contains the following:
The actual Pebble board
The GPS Antenna
A male, 2-poles 1.25mm pitch power connector
A label with the IMEI number for your board
Board Layout
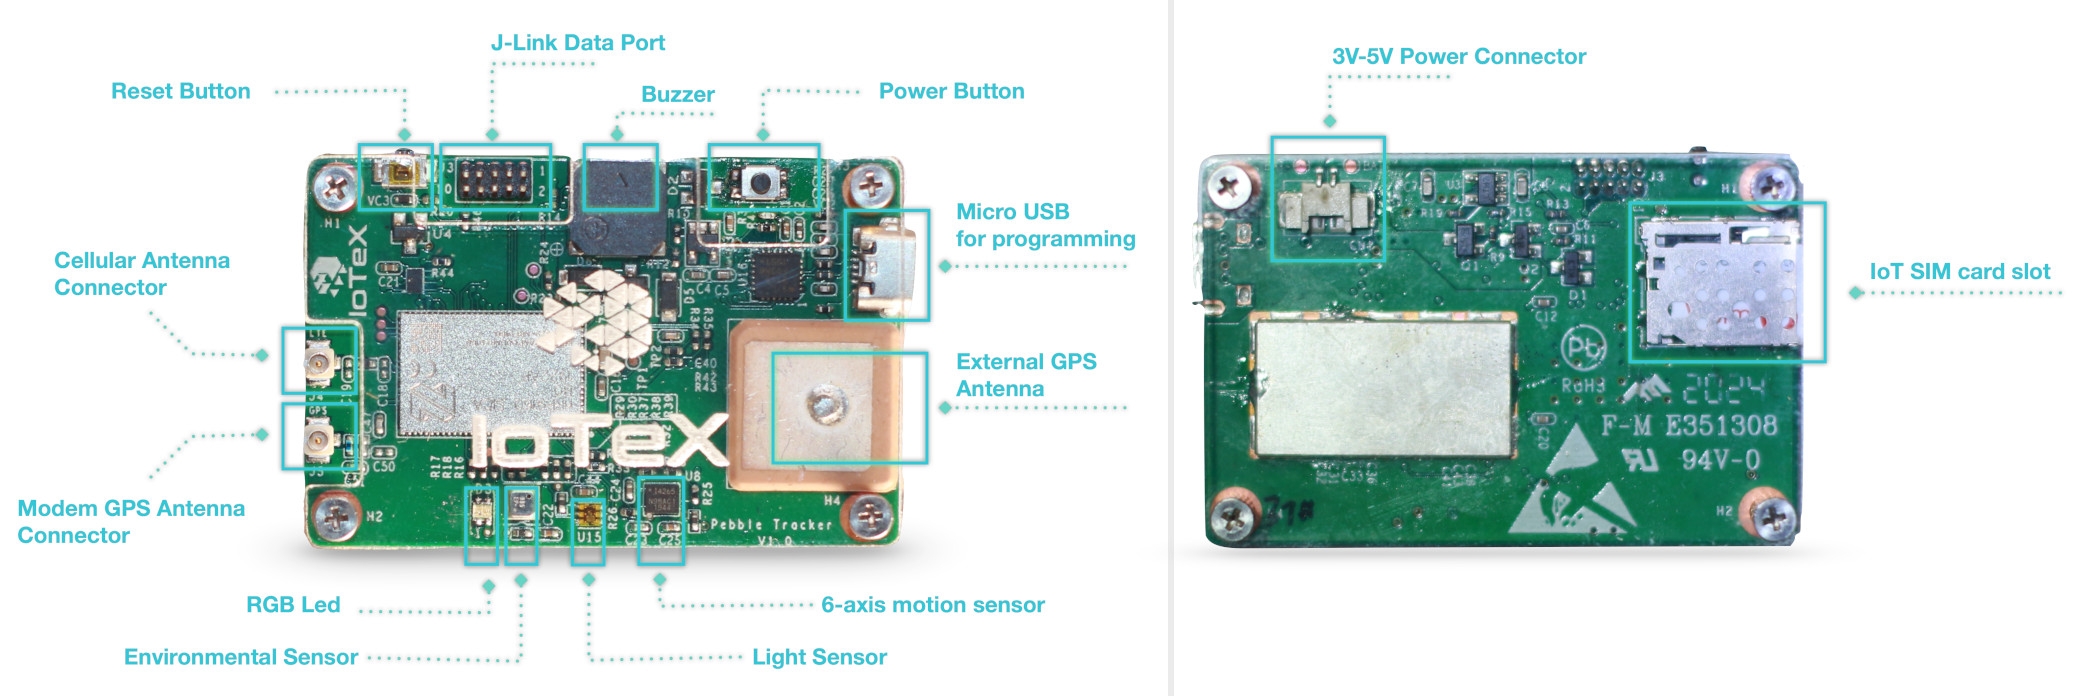
Relevant slots, connectors and switches on Pebble include the following:
Power connector: this is a 2-poles, 1.25mm pitch, female connector. Please notice that Pebble power circuit does not provide polarity-inversion protection, therefore please check the polarity carefully when connecting the battery or any power supply
SIM card slot: this is a micro-SIM slot where you can insert any IoT SIM card.
Micro-USB port: this port is used to charge the battery connected to the power supply input. The Micro-USB port can also be used to program the Pebble.
Reset button: This is a small switch button that allows to reset the board software (short press) or to put the board in recovery mode (see [TODO: Flashing the firmware]).
Data port: the data port is used to program and debug the board using the SEGGER JLink programmer/debugger
Cellular and GPS antenna: these two coaxial inputs allow the connection of a GPS and/or a cellular external antennas
Inserting a SIM card
Insert a IoT Micro-SIM into the Pebble SIM card slot until it's locked inside. Pebble supports both LTE-M and NB-IoT cellular standards: check which one is supported in your country and that the SIM card you use is compliant with te same standard.
Here is a list of IoT-SIM cards that are known to work with Pebble:
Pebble comes preinstalled with the firmware in NB-IoT configuration: if you need support for LTE-M instead, then you will be required to configure and flash the Pebble firmware to enable LTE-M.
Connecting the LTE Antenna
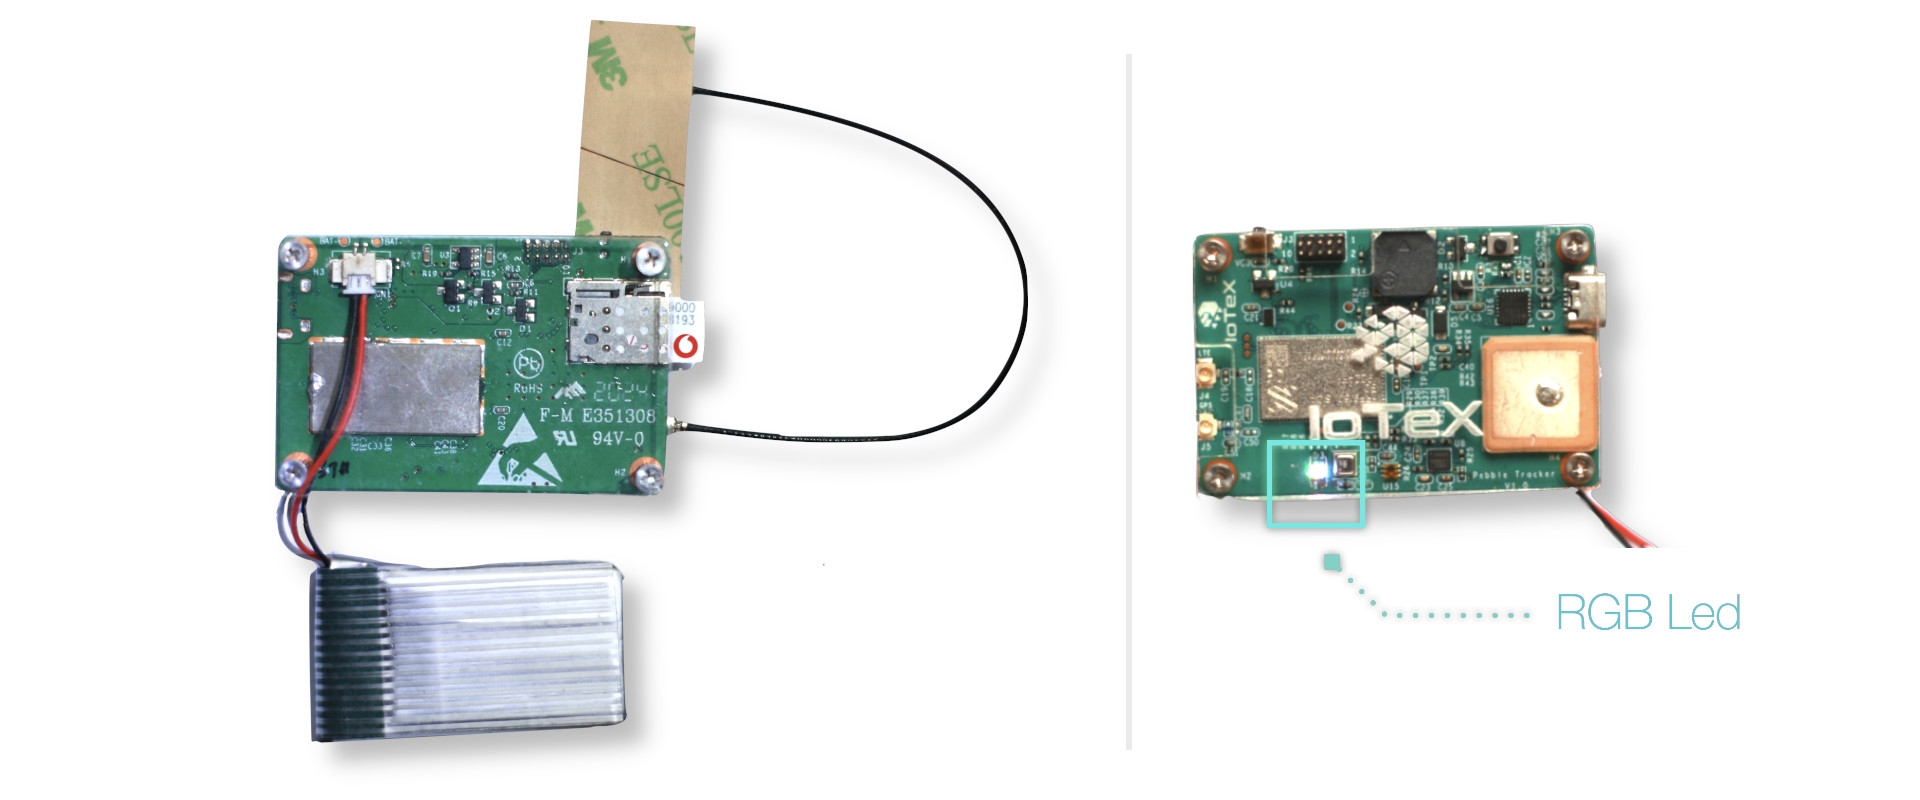
Locate the LTE Antenna connector on the board and carefully connect the antenna you find in the Pebble package. The antenna also provides an adhesive strip to conveniently fix it to any surface.
Connecting a battery
Pebble requires a DC power supply in the range of 3V - 5V, that must be provided to the female power socket using a 2-poles 1.25mm pitch male plug. You can both find a battery that fits the space in the default Pebble case, or reassemble the case to provide more space to fit your battery. If your battery connector is not compliant with the Pebble power socket, you can replace it with the extra power connector included in the package.
Depending on the shape of your battery, the maximum area sizes available for it to be entirely enclosed into the default case are:
44.0mm x 35.0mm x 7.0mm
25.7mm x 53.0mm x 7.0mm
24.0mm x 25.7mm x 7.4mm
21.0mm x 35.0mm x 7.4mm
Possible batteries that would fit are (according to the datasheets, please verify with the manufacturer or the supplier):
Once the battery is connected you can press the reset button: you will see the RGB led light up and blinking every 5s.
Charging the battery
You can connect Pebble to a USB charger or to your PC using the micro-usb connector to recharge your battery. Once the battery is fully charged you will see the RGB led to light up in green.
Last updated