ioPay Mobile Users
In this document, we explain how to contribute your location data to the API from your iOS or Android device, and monetize your GPS data in dApps that use the service.
Step 1. Install ioPay wallet.
Install ioPay mobile wallet for your system, and create a new wallet:
When creating a new blockchain wallet, always make sure you write down the wallet's private key correctly and store it in a safe place. The private key is the only way you have to recover your crypto assets in case you lose access to your phone, or to the ioPay application.
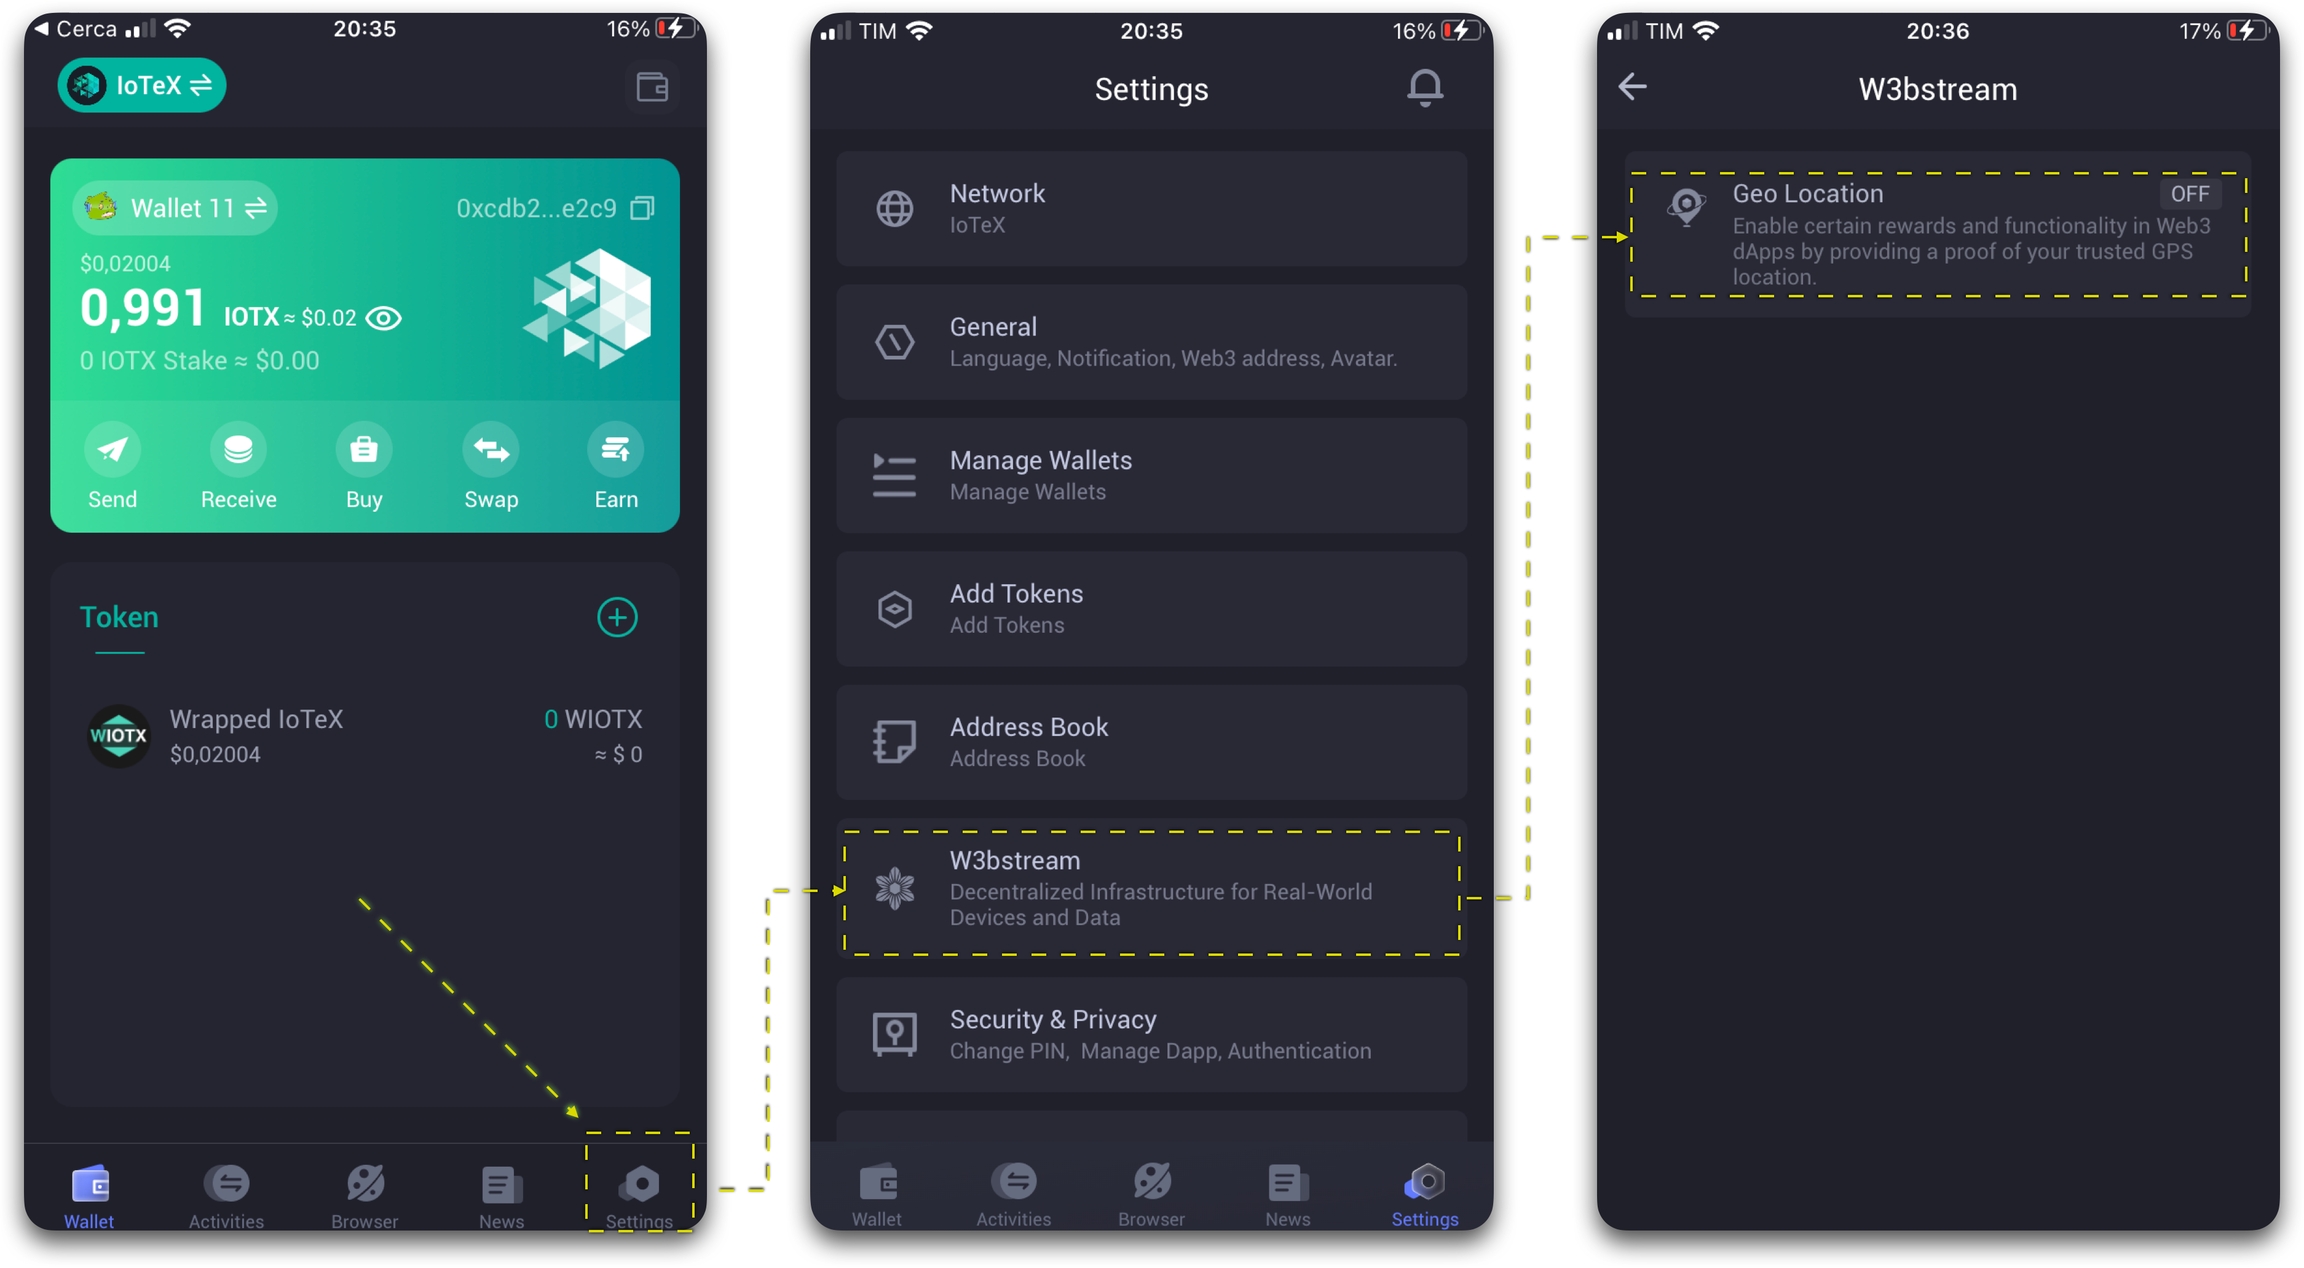
Step 2. Open the trusted location plugin.
In ioPay, select Settings-->WebStream-->Geo Location
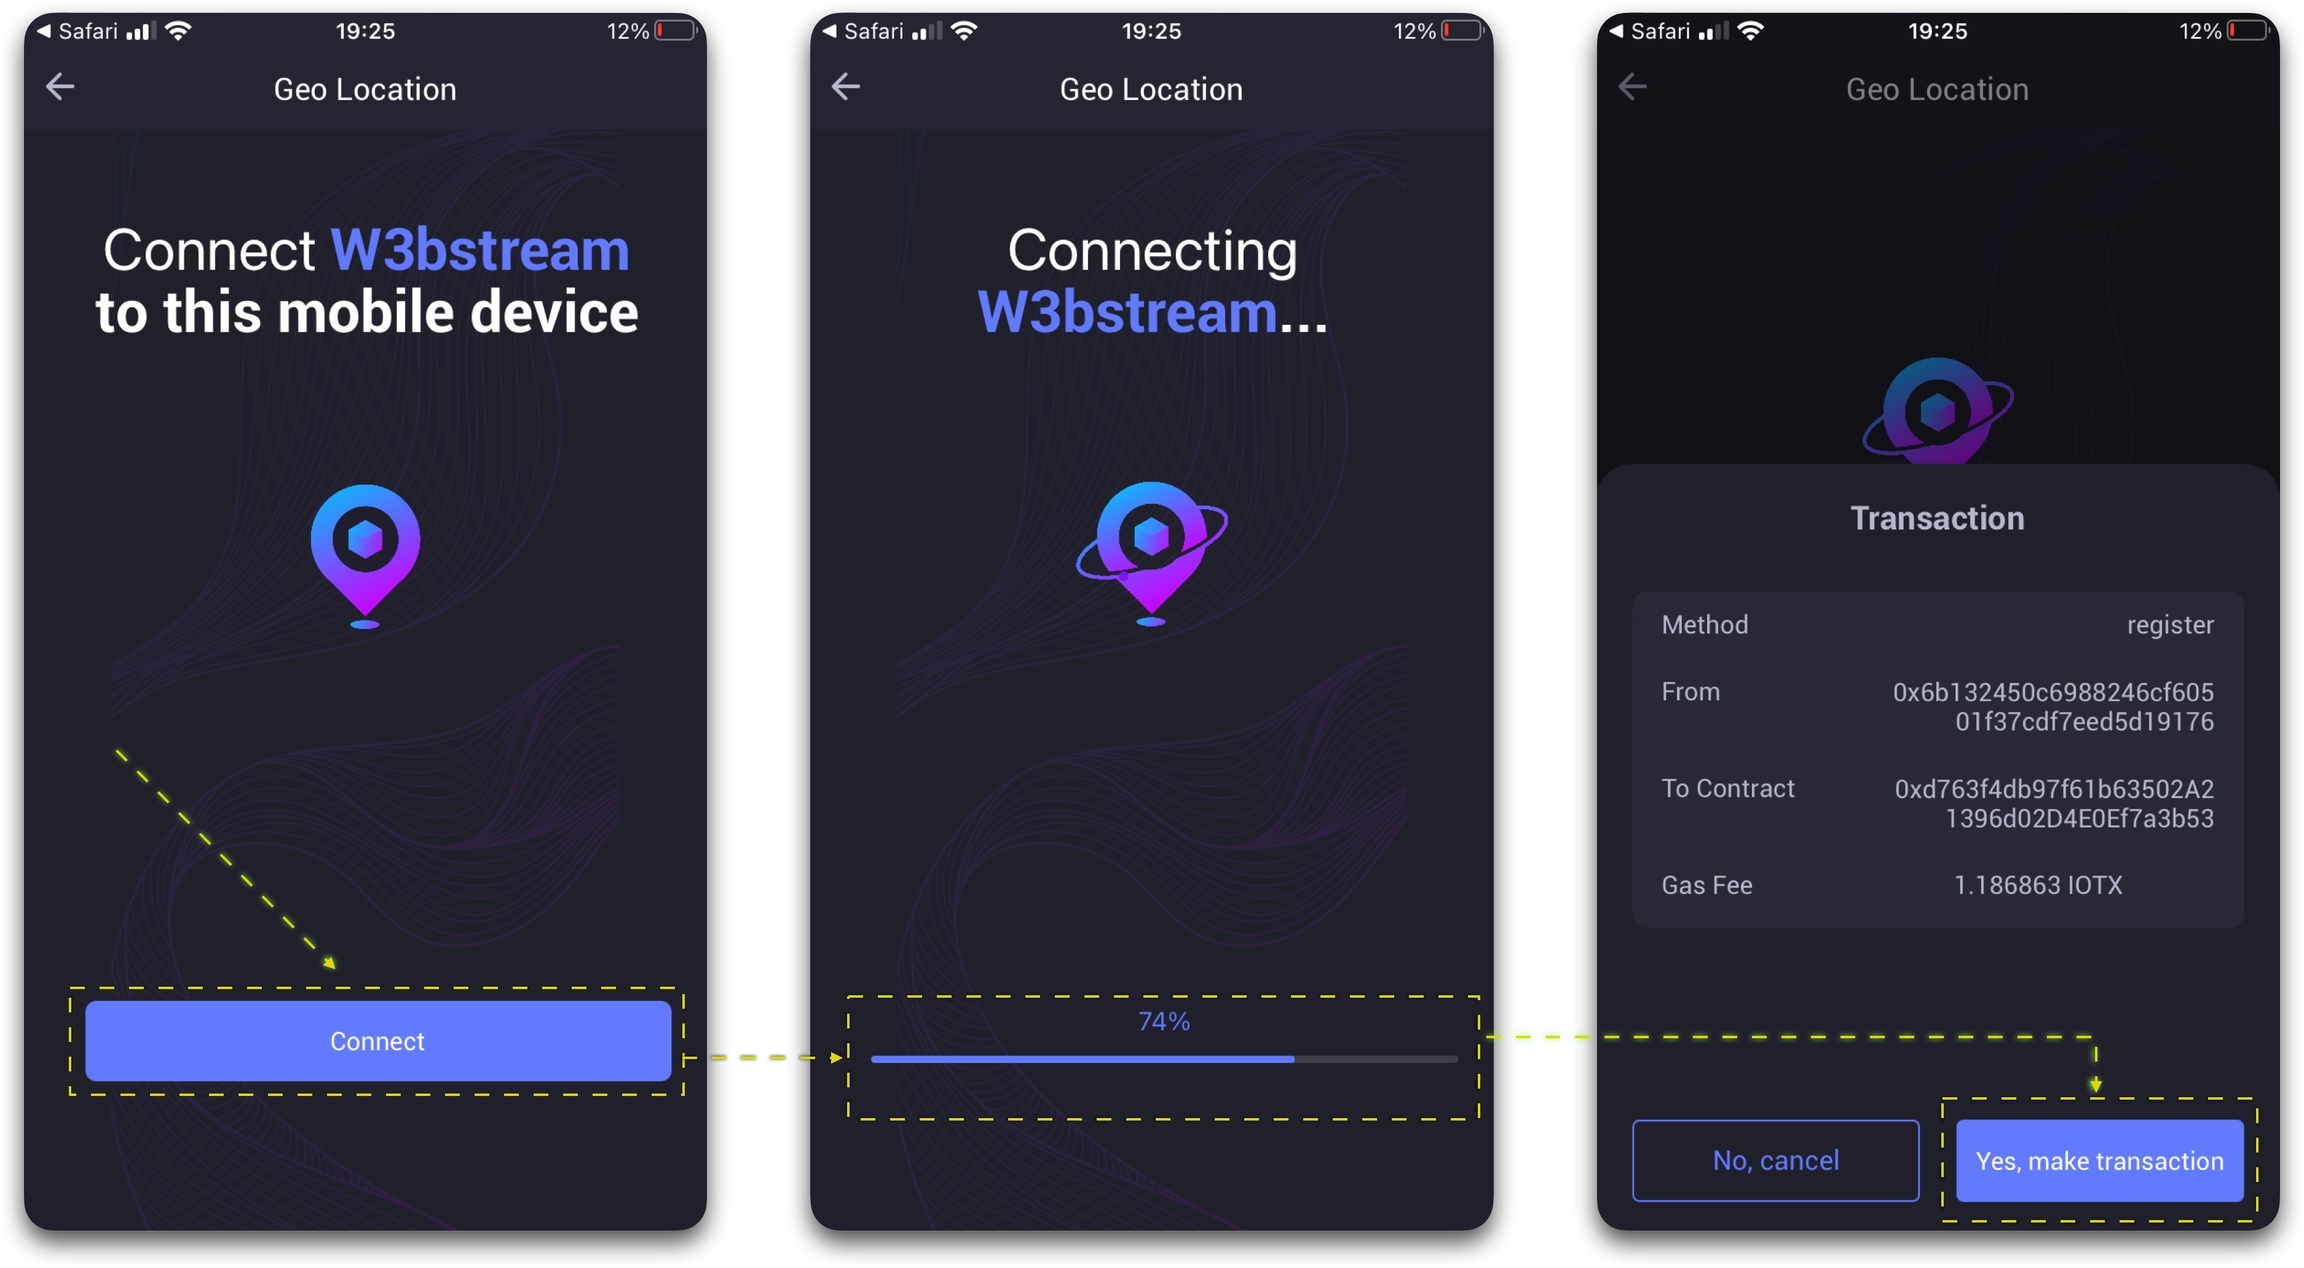
Step 3. Setup trusted location
The first time you open the geo-location section of ioPay, you will have to register your device: the registration process requires you to have 1 IOTX in your wallet (plus a few cents to pay for the tx fee on the IoTeX chain). The registration process will generate a random IMEI and serial number for your device and will associate it with your ioPay wallet address.
Start the registration process.
Wait for registration to complete.
Sign the transaction to associate your ioPay wallet with the plugin.
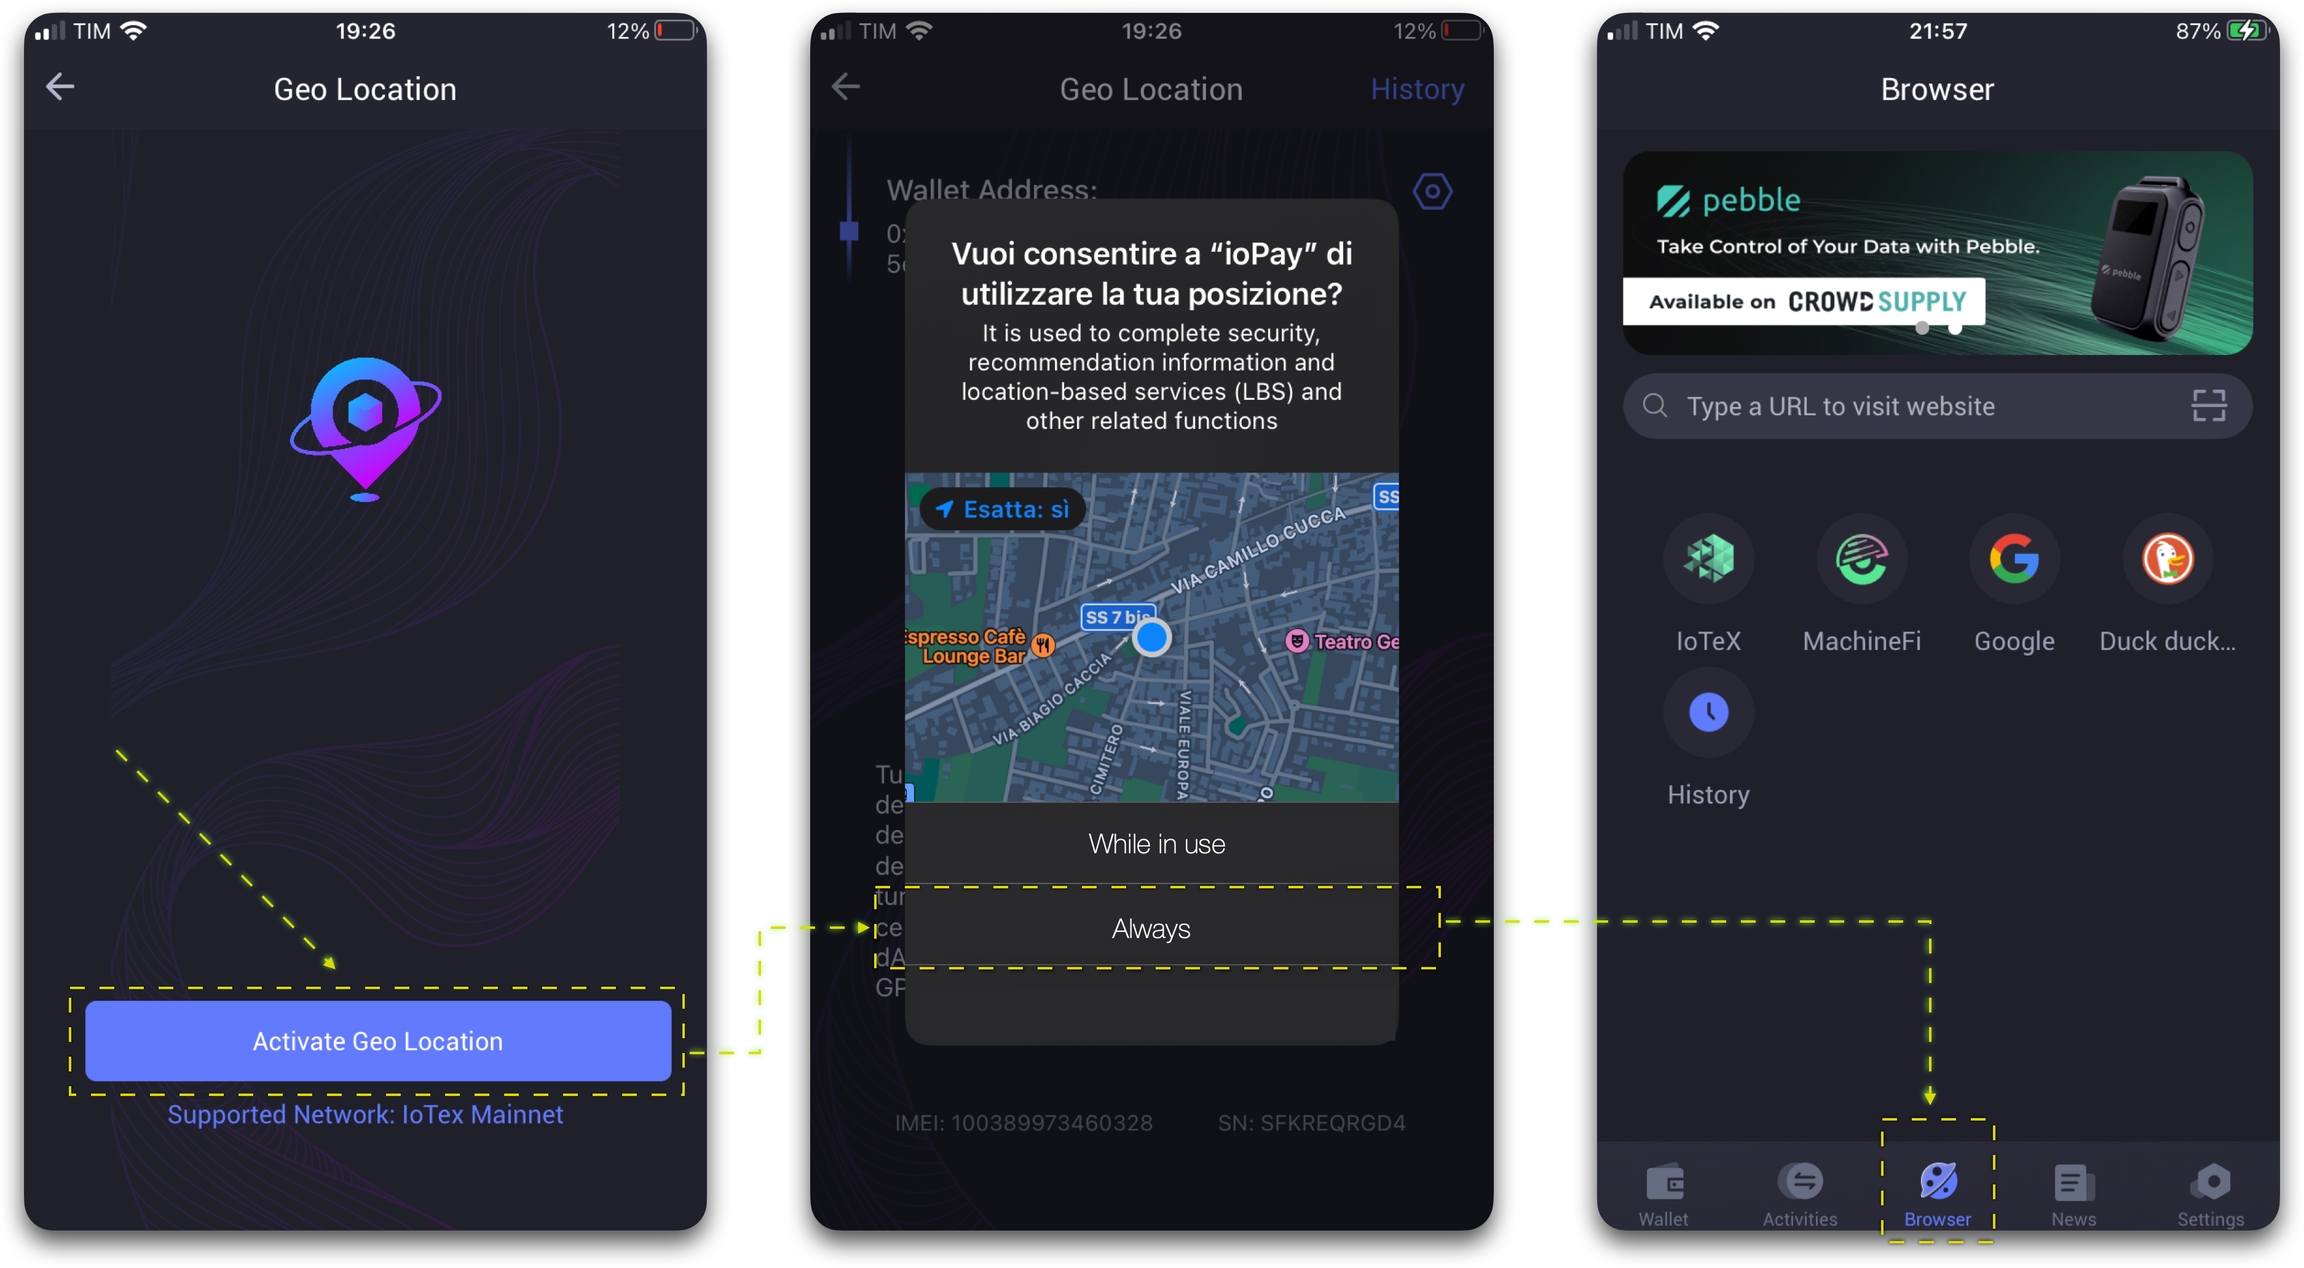
4. Wait for the registration to complete.
5. Allow ioPay to access the GPS location
6. The home screen will show up at the end of the registration
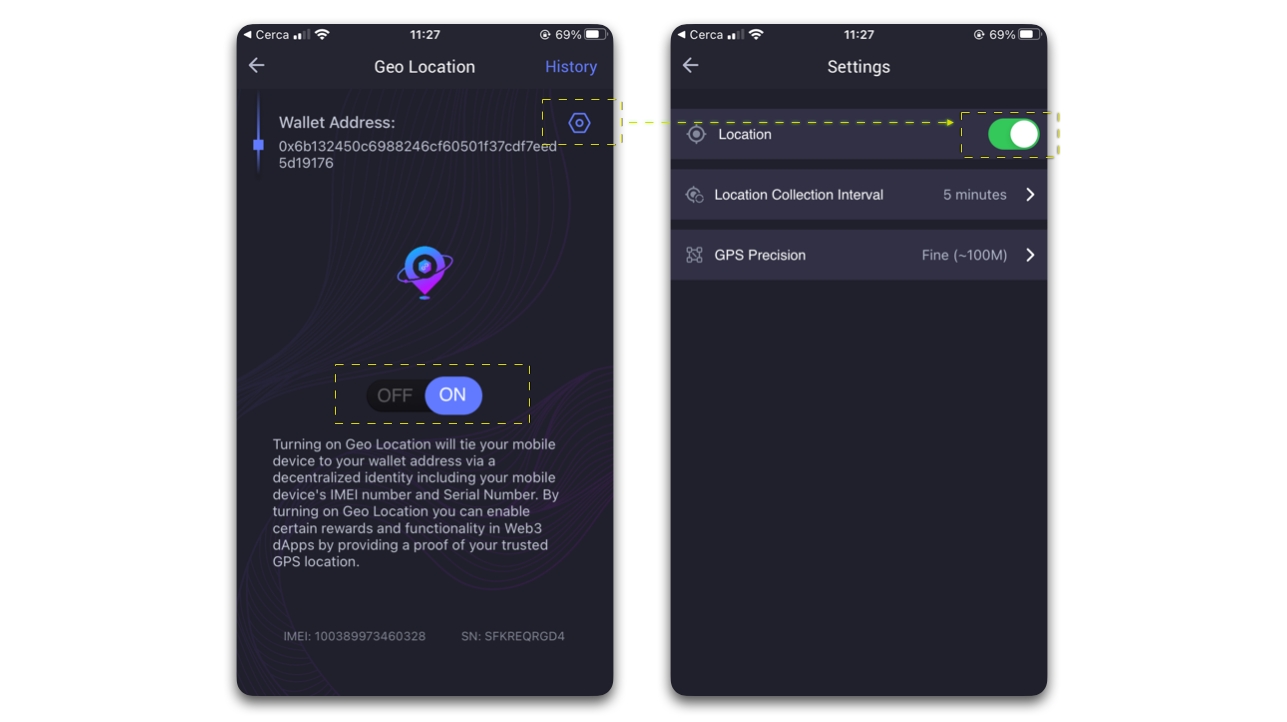
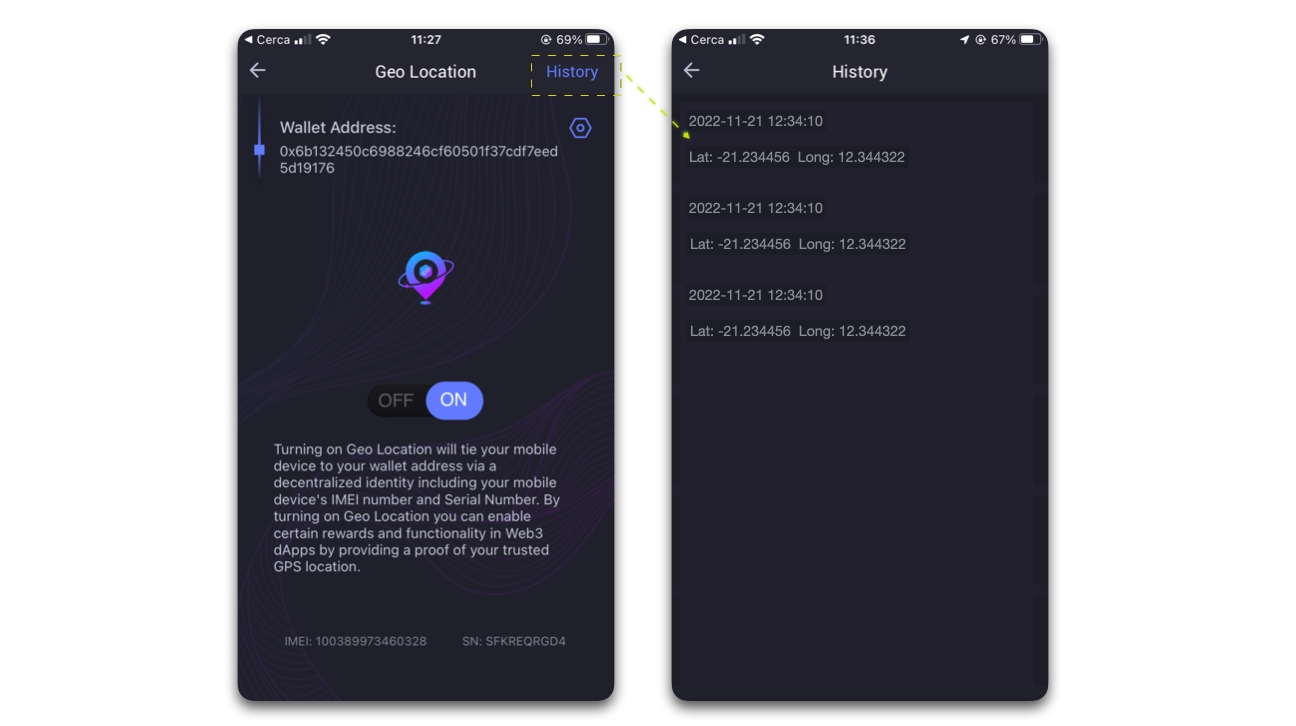
7. Use the ON/OFF switch on the home screen to enable/disable sending location data, and access the Settings screen to configure how often and with what precision the Location should be sent
8. Access the History screen to see the details of all location data sent by your device:
Last updated